Bosch Flash Tool
Bosch ECU Flashing Tool
What is the Bosch ECU Tool
The Bosch ECU flash tool, known as the Penta Performance Basic Flash Kit, is a premier solution designed to optimize your vehicle’s performance to its fullest potential. This kit allows users to flash custom tunes to their engine’s ECU through a straightforward OBD process, without the need to physically remove the ECU. The kit comprises a Performance Flash Tool for smooth tuning, an OBD-II Cable for a secure connection to the vehicle’s ECU, and the latest software and firmware to ensure your vehicle is always at peak performance. With the Penta Performance Basic Flash Kit, users can experience enhanced throttle response, increased horsepower, better fuel efficiency, and other performance improvements. Notably, this kit isn’t tied to a specific vehicle VIN, offering flexibility for future resale or transfers.
Usage Overview
The Bosch ECU Tool connects to your ECU via the OBD port. There is no need to remove the ECU.
The flow of the process is listed below. PLEASE FOLLOW THIS SEQUENCE TO THE LETTER. FAILURE TO DO SO CAN DAMAGE YOUR ECU.
1.) Plug in vehicle to a power supply (recommended).
2.) Plug in tool to OBD and Laptop
3.) Launch the software and choose your ECU.
4.) Switch Ignition to Position 2 to power up ECU.
5.) Choose Connect to enter bootloader mode. This will cause your cluster to turn off.
6.) Proceed with the Operation (Reading or Writing)
7.) When finished, click Disconnect.
8.) Turn ignition to 0 and remove key.
9.) Reinsert key and start. If the vehicle starts, then the reading/flashing process was successful.
IMPORTANT NOTES:
- Make sure that you disconnect the tool before switching the ignition to 0. If you do not follow this step, the ECU will not exit bootloader mode and will not start the vehicle.
- The reading and flashing should only take 4-8 minutes so technically, you can get away without a power supply; provided your battery is healthy. If in doubt, drive your vehicle for at least 15min prior to make sure the battery is freshly charged.
How to read the ECU
The very first step you should do is to read the ECU. Apart from having access to your ECU file, this is an important step in terms of having a safety-net as this allows you to backup your ECU. In the event that you damage(brick) the ECU, you can purchase a used ECU and upload your backup file.
There are 2 parts of the memory you need to access. The first one is the flash file. This file is where the ECU maps are stored. This is the file that you need to send to us.
The second file is the EEPROM. Think of this as the identification of your vehicle which stores the VIN and other identifiers. This is what the other electronic modules in your vehicle refer to when they need to verify the identity of the ECU.
Pre-checklist:
- Software is installed and running.
- Vehicle is plugged in to the power supply, if needed.
- Vehicle is NOT running.
Step 1:
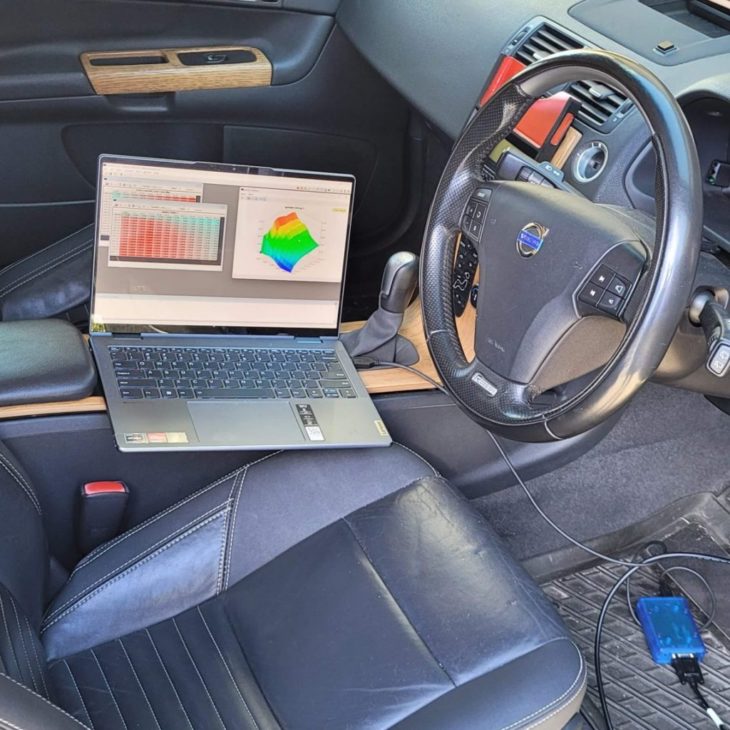
Plug in the Bosch Tool to the OBD port. The light on the tool should show RED.
Next, plug the device to the laptop. The light should change to VIOLET.
IMPORTANT: Make sure that the laptop is placed in a stable surface. Also, the cables must be wired in safely. If during operation the cable gets unplugged or the laptop dies, there is a chance you will corrupt the ECU, making it unusable.
Step 2:
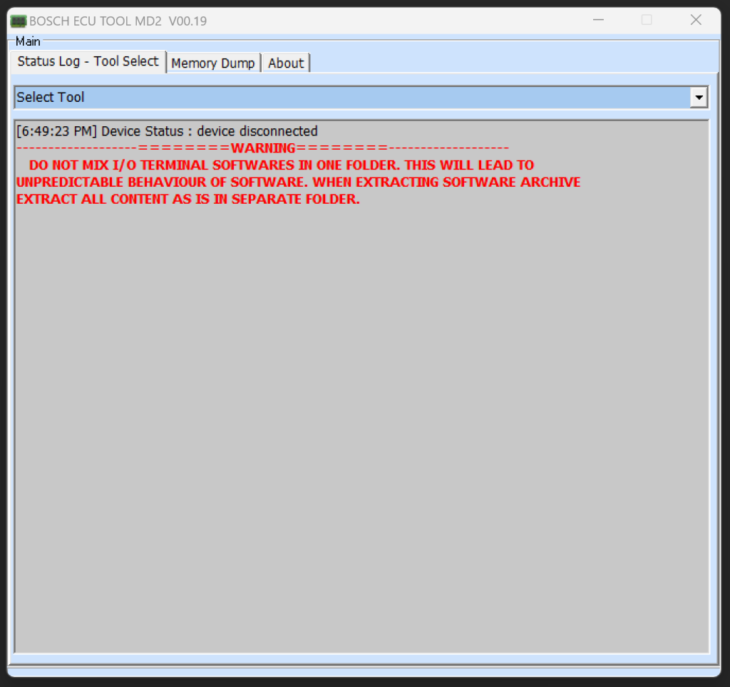
Choose the ECU in the dropdown list.
- For P1 T5, choose Volvo Bosch ME9.0 29bit CAN.
- For P1 D5, choose VOLVO BOSCH EDC16C34 29bit CAN.
- For Volvo P2, choose Volvo ME7 250kbps (2002 earlier)
- For Volvo P2, choose Volvo ME7 500kbps(2002 onwards).
Step 3:
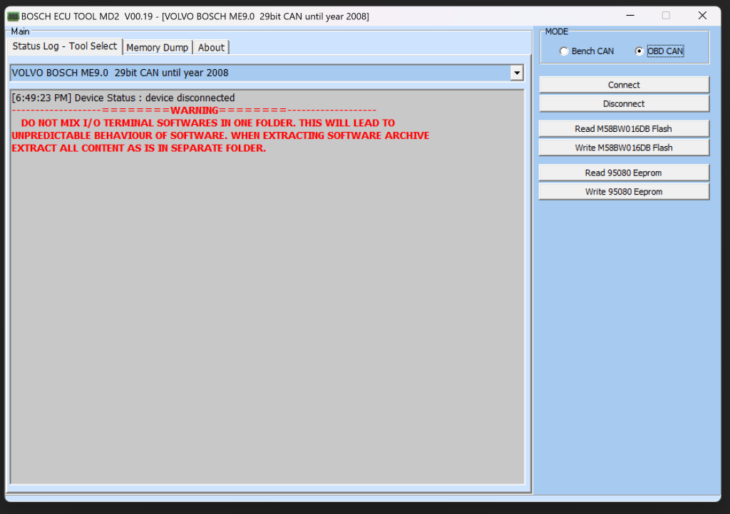
Choose OBD CAN option from the top. You will almost never use BENCH CAN so make sure you make a habit out of this step.
Step 4:
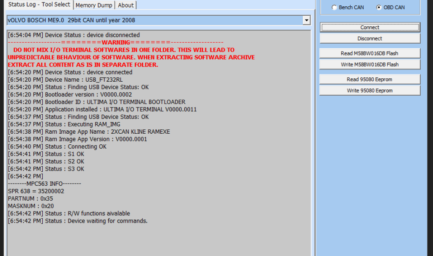
Turn ignition to II. This should light up the dash, but the vehicle is not starting. After this, click on the Connect button. Make sure the output is similar to the photo on the right. If it is not the case, double check your steps.
Step 5:
To read the ECU, first download the FLASH file. Click on the READ FLASH button. The progress bar below will show the completion of the process. Once the text “Device waiting for commands” show up again, the process is finished and the file has been successfully loaded to the memory dump.

Step 6:
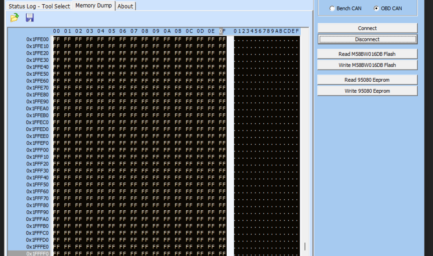
To save the file, go to memory dump tab at the top. If there is a file on the memory dump, this section would show the hex format of the file. Click on the Save icon on top and choose a file name. If this is the stock file, name it “stock” or “original” for better file keeping. Repeat steps 5 and 6 for the EEPROM.
Step 7:
Once done, click DISCONNECT to exit bootloader mode. Your cluster should light up right after this. Switch the key to 0 and remove key. It is normal to see errors regarding “brake failure” during this time. It should disappear after you remove the key. Reinsert key and try to start the car. If it starts, the reading is successful.
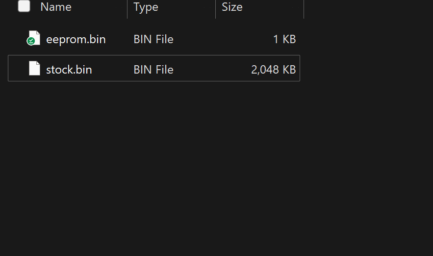
Double check the files you have saved. The FLASH file should be 2048 KB and EEPROM 1 KB.
Step 8:
Once successful, compress the flash file using ZIP or RAR and email to us. We will modify your original file to accommodate for the tune. FLASH FILES ARE VEHICLE SPECIFIC. DO NOT LOAD A FLASH FILE FROM A DIFFERENT VEHICLE. THIS CAN CAUSE A BOOT LOOP AND WOULD REQUIRE A NEW ECU. If dealing with multiple vehicles, I suggest you label the files appropriately.
How to write a modified file on the ECU
The process of writing a modified tune to your ECU is somewhat the reverse of the reading process. It is much better to memorize this as during the tuning process, you only ever read the ECU once, yet would need to flash multiple times. Also, the likelihood of corrupting the ECU during the Writing process is a lot higher than reading the ECU. Therefore, extra caution must be taken when undertaking this process.
Pre-checklist:
- Software is installed and running.
- Vehicle is plugged in to the power supply, if needed.
- Vehicle is NOT running.
Step 1:
Plug in the Bosch Tool to the OBD port. The light on the tool should show RED.
Next, plug the device to the laptop. The light should change to VIOLET.
IMPORTANT: Make sure that the laptop is placed in a stable surface. Also, the cables must be wired in safely. If during operation the cable gets unplugged or the laptop dies, there is a chance you will corrupt the ECU, making it unusable.

Step 2:
Choose the ECU in the dropdown list.
- For P1 T5, choose Volvo Bosch ME9.0 29bit CAN.
- For P1 D5, choose VOLVO BOSCH EDC16C34 29bit CAN.
- For Volvo P2, choose Volvo ME7 250kbps (2002 earlier)
- For Volvo P2, choose Volvo ME7 500kbps(2002 onwards).

Step 3:
Choose OBD CAN option from the top. You will almost never use BENCH CAN so make sure you make a habit out of this step.

Step 4:
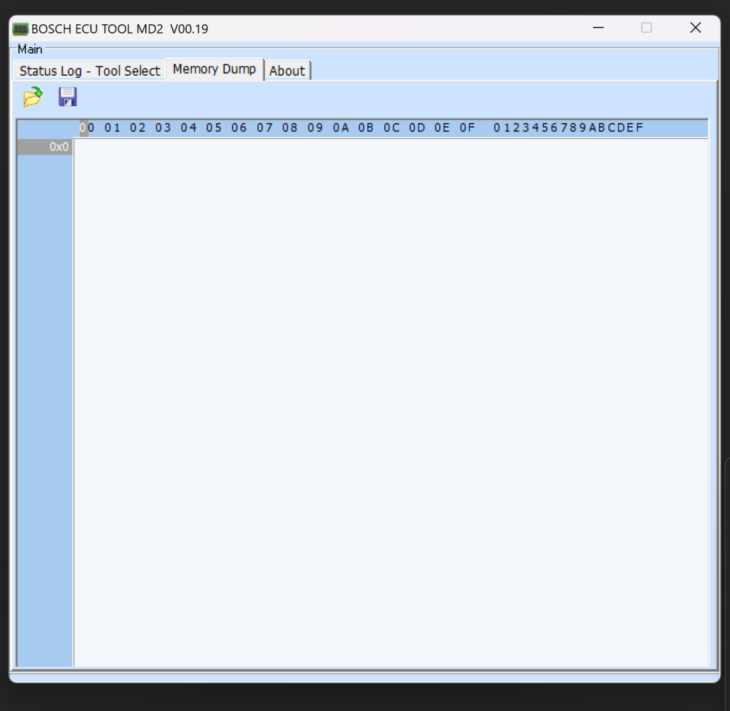
Click on the memory dump tab of the app. The memory dump should show as blank. Click on the folder icon on top and choose the file to load. Double-check that you are loading the correct file. Once loaded, you will see some hex characters on the view panel. This means that the software was loaded into memory correctly.
Step 5:
Turn ignition to II. This should light up the dash, but the vehicle is not starting. After this, click on the Connect button. Make sure the output is similar to the photo on the right. If it is not the case, double check your steps.

Step 6:
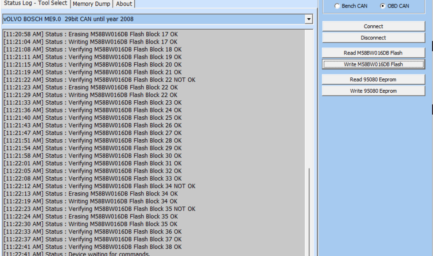
To write on the ECU, click on the WRITE FLASH button. The progress bar below will show the completion of the process. It will now start writing the 38 clusters. Once the text “Device waiting for commands” show up again, the process is finished and the ECU has been re-written.
Step 7:
Take the vehicle for a test drive. If the vehicle is running fine then it means the flashing was successful! You are done! For competition tunes, you may now start datalogging your vehicle. When flashing the ECU, the fuel trims and adaptation gets reset. Therefore, the vehicle may adjust after a day or two. During this adaptation period, fuel consumptions may be slightly off however, it should adjust eventually.
Step 8 (Competition Tunes Only):
After datalogging, send us your logs so we may assess and revise the tune as needed. Once you have received the revised tune, repeat steps 1 to 7.
